CoreData
Persist or cache data on a single device, or sync data to multiple devices with CloudKit
- 일시적 혹은 영구적으로 데이터를 저장할 수 있는 Swift framework.
- 단일 디바이스에서 사용할 수도 있고, CloudKit을 사용하면 여러 디바이스에서 동기화된 데이터를 사용할 수 도 있다.
- 코어데이터를 사용하여 모델을 정의하고 데이터 타입을 및 관계를 만들어서 사용할 수 있다.
기능
Persistence
- CoreData는 오브젝트와 저장소의 매핑과정을 추상화 하기 떄문에 쉽게 데이터베이스에 직접 데이터를 저장할 수 있다.
- add undo, redo 기능을 제공한다.
Background Data Tasks
- UI-blocking을 하는 데이터 처리등을 백그라운드에서 처리할 수 있다.
View Synchronization
- CoreData는 table, collection Views를 위해 데이터 소스를 제공함으로써 views와 data의 동기화를 도와준다.
Versioning and Migration
- 데이터모델에 대한 버저닝과 migrating을 메카니즘을 포함한다
CoreData Project에 추가 하기
- 두 가지 방법이 존재한다.
- 프로젝트 생성 시 CoreData 추가하여 프로젝트 생성 방법.
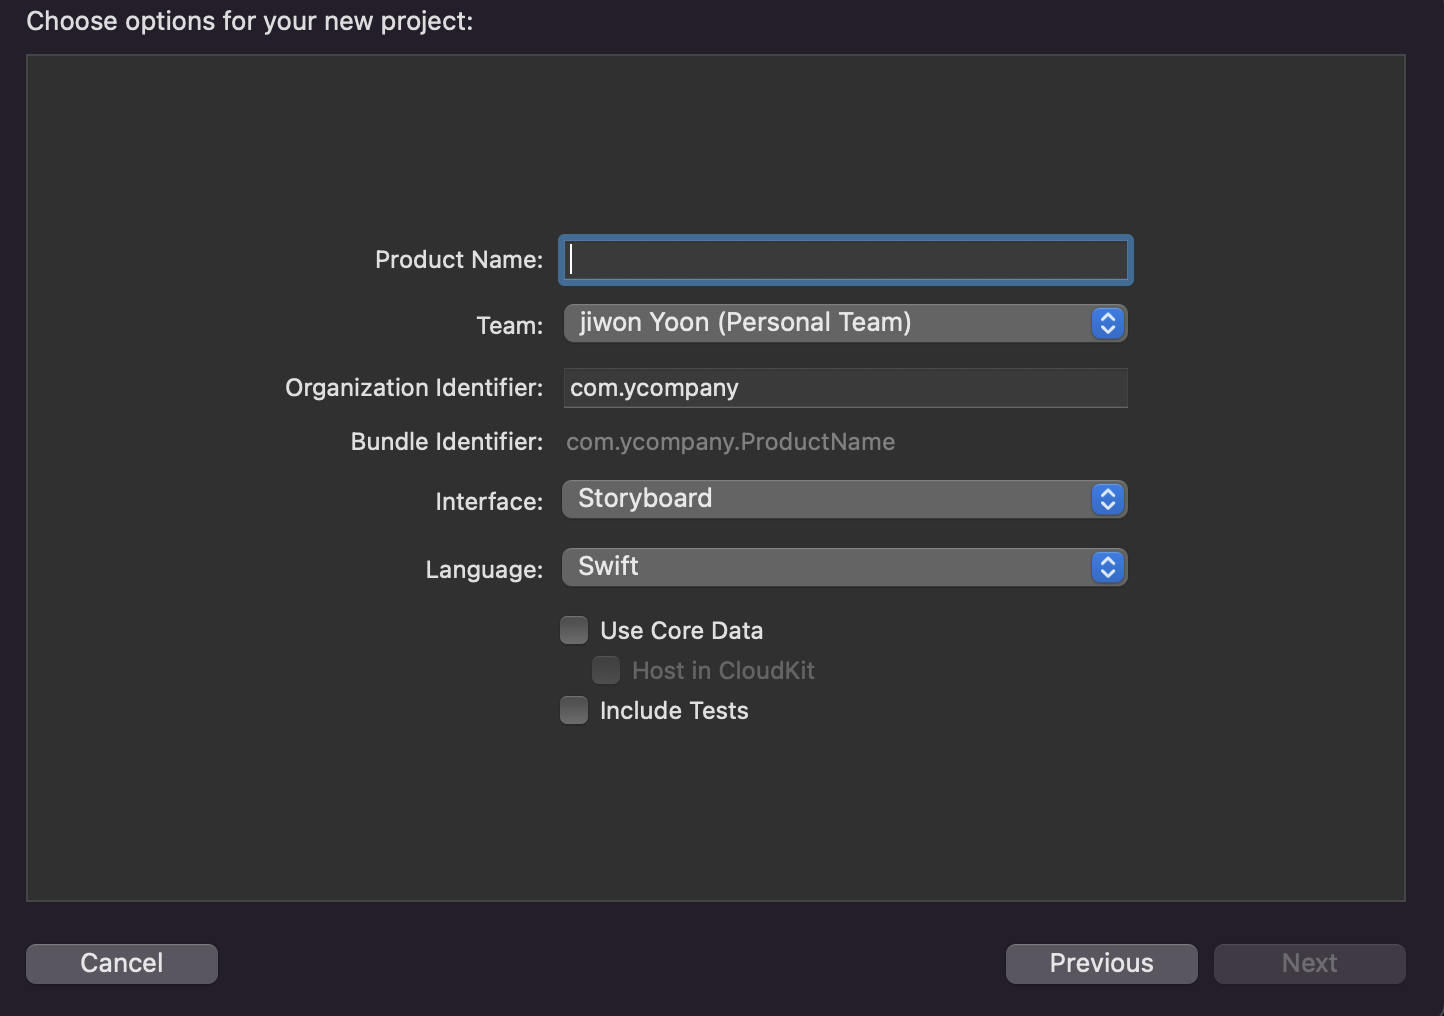
- CoreData를 추가하여 프로젝트를 생성하면, 아래와 같이 기본적인 구성이 AppDelegate에 추가 된다.
// MARK: - Core Data stack

    lazy var persistentContainer: NSPersistentContainer = {
        let container = NSPersistentContainer(name: "Model")
        container.loadPersistentStores(completionHandler: { (storeDescription, error) in
            if let error = error as NSError? {
                fatalError("Unresolved error \(error), \(error.userInfo)")
            }
        })
        return container
    }()

    // MARK: - Core Data Saving support
    func saveContext () {
        let context = persistentContainer.viewContext
        if context.hasChanges {
            do {
                try context.save()
            } catch {
                let nserror = error as NSError
                fatalError("Unresolved error \(nserror), \(nserror.userInfo)")
            }
        }
    }
- NSPersistentContainer(name:"") 에 들어가는 키워드는 DataModel의 이름이다.
- 기존에 프로젝트에 CoreData Model 추가하는 방법.
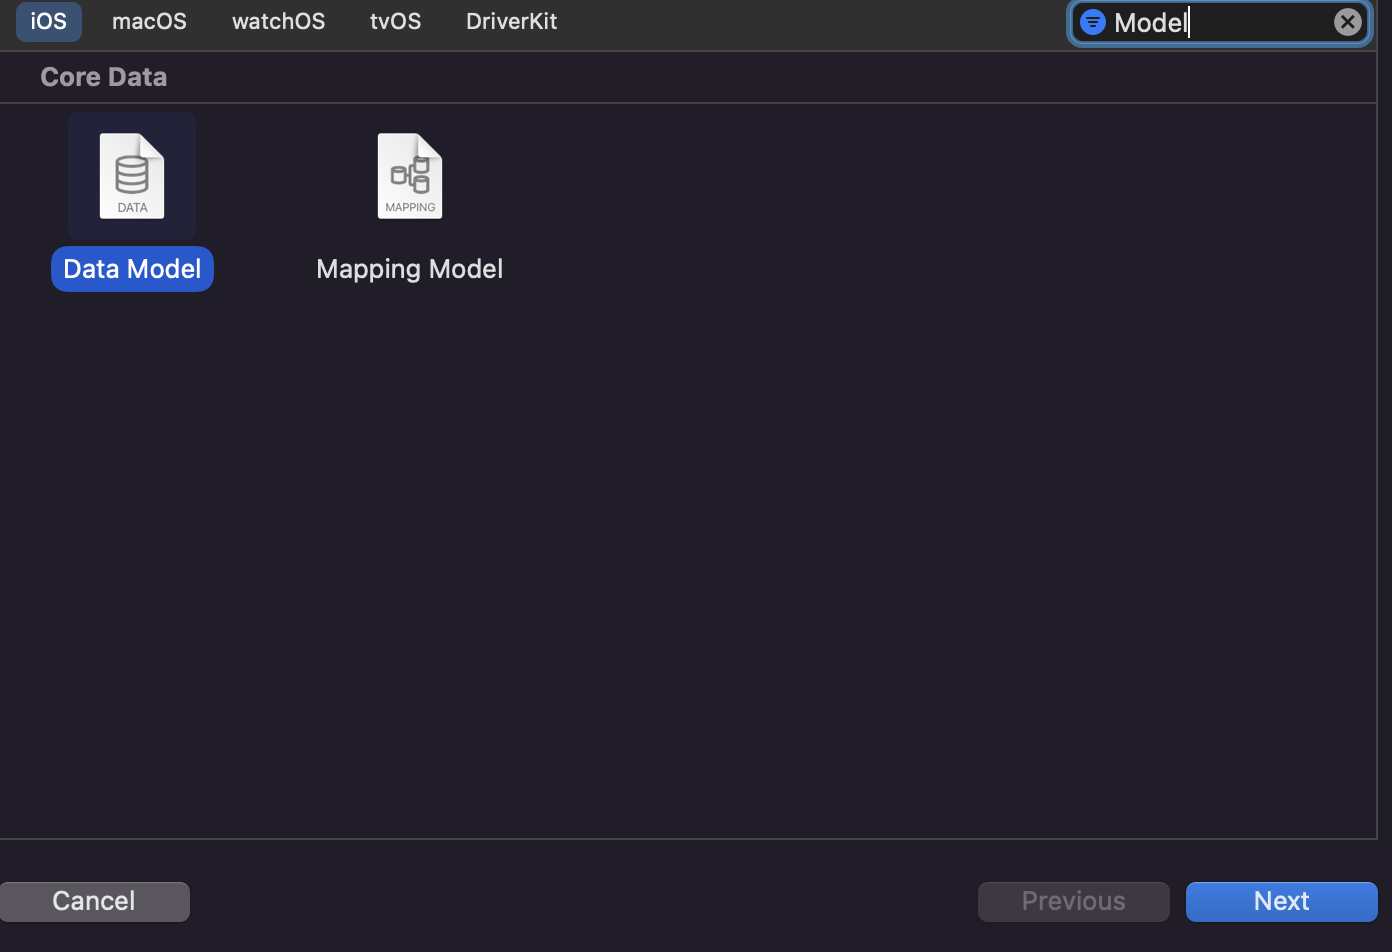
- 기존 프로젝트에 CoreData Model을 추가한 경우, NSPersistentContainer 구성을 수동으로 추가해 주어야 한다.
- AppDelegate에 내용을 추가해도 되고, 새로운 클래스를 구성하여 만들어도 된다.
Setting Up a Core Data Stack
- PersistentContainer 구성도
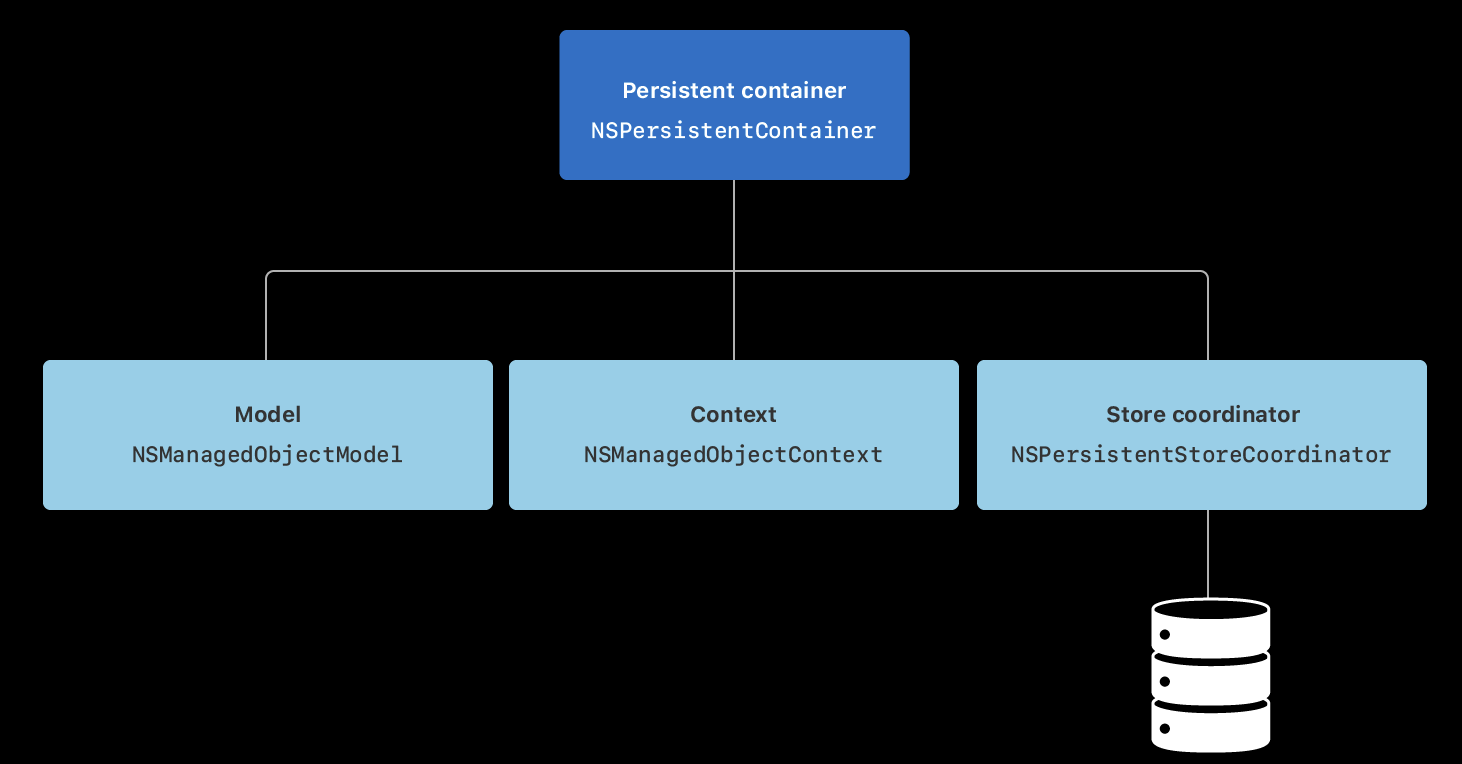
- Model
- NSManagedObjectModel
- DataModel에 구성했던 타입, properties and relationships를 나타낸다
- Context
- NSManagedObjectContext
- 앱 타입들의 instances들의 변화를 트래킹
- Store Coorninator
NSPersistentStoreCoordinator
- 데이터의 저정 및 fetch(로드) 를 담당한다.
NSPersistentContainer는 model, context, store coordinators 한번에 셋업 한다.
Initialize a Persistent Conainer
- lazy var 로 persistentConainer를 appDelegate에 선언하면 사용되기 전까지 인스턴스 생성을 미루기 때문에 lazy로 선언해 놓고 사용한다.
- 프로젝트 생성시 coredata를 클릭해 놓으면 자동적으로 생성된다.
- persistentContainer가 생성되면 해당 container는 model, context, and store coordinator instances를 참조하게 된다.
Configuring Entities
- Entity란 CoreData Model에서 사용될 객체라고 생각하면 된다.
- name, attributes, relationships 등을 포함한다
- CoreData Model 생성하고 아래와 같이 Entity를 추가할 수 있다.
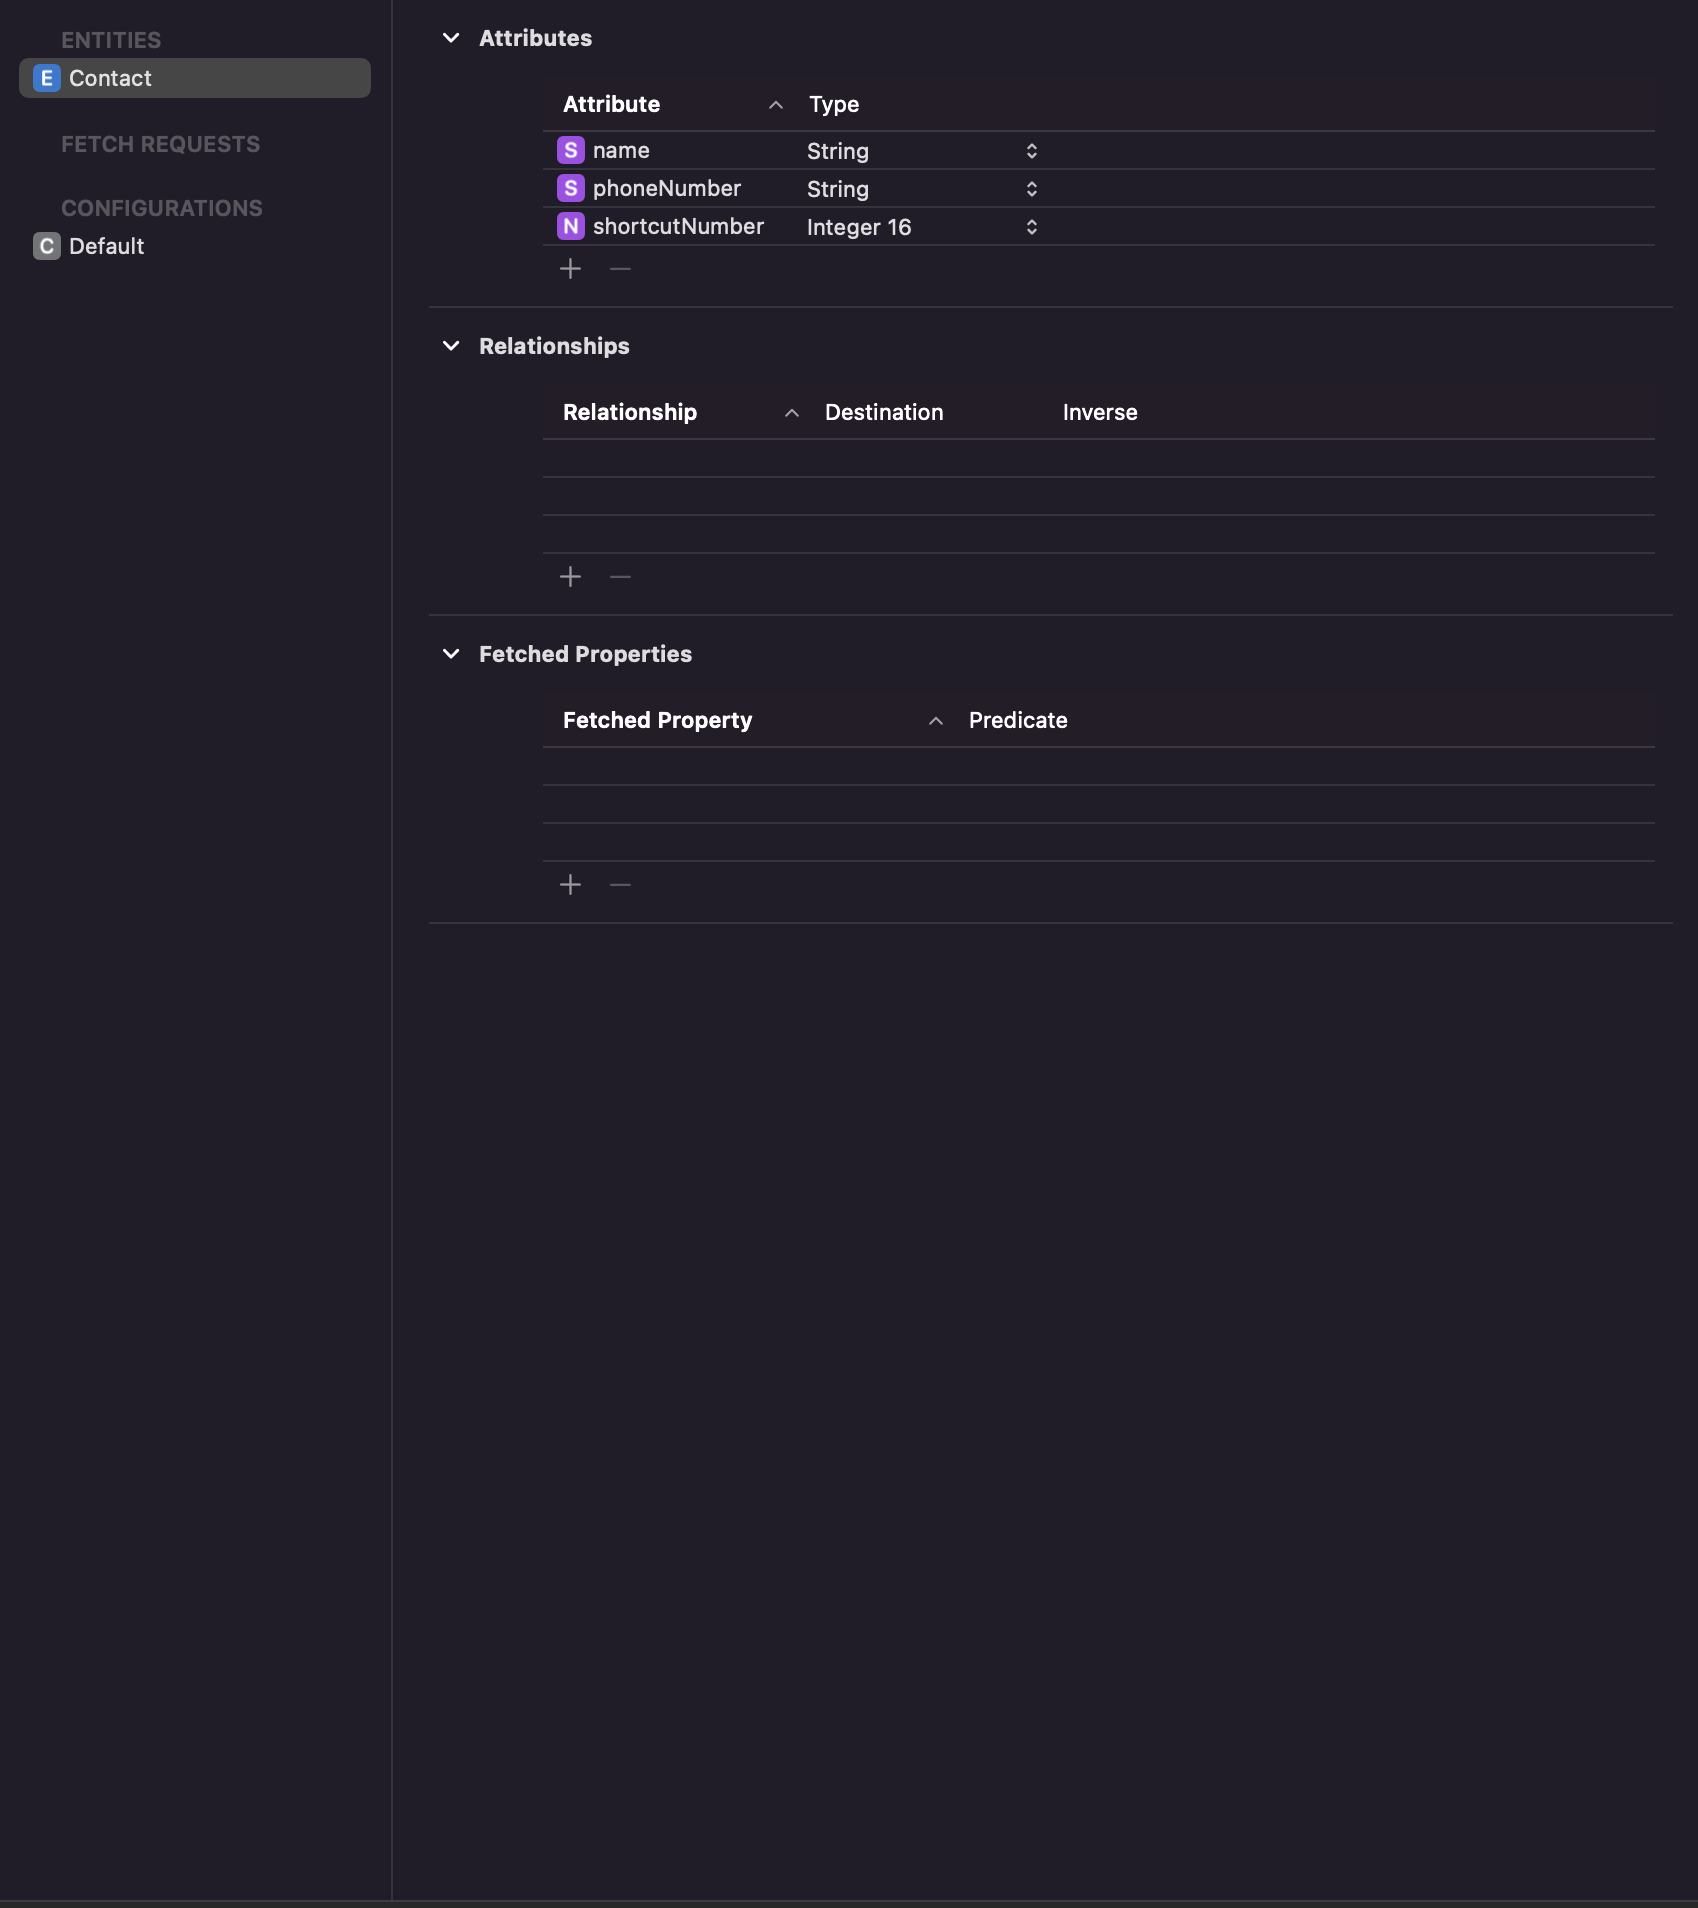
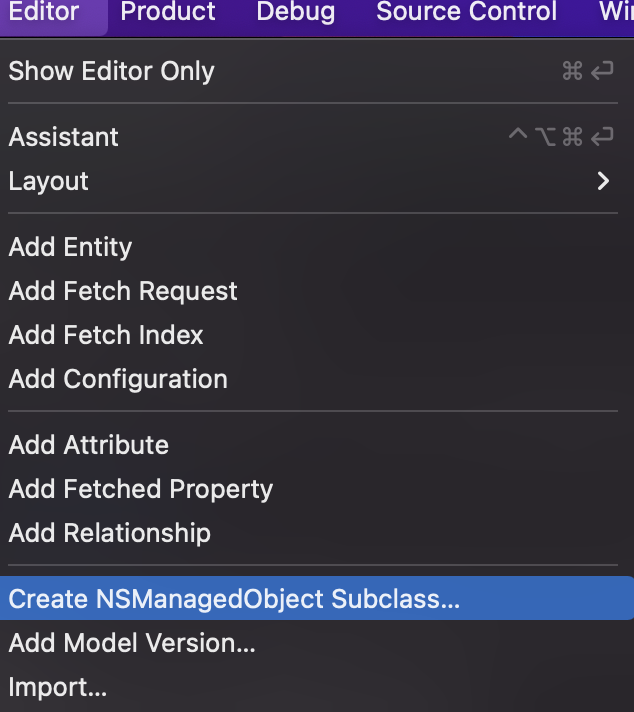
- entity는 기본적으로 codegen에 Manual/None으로 구성되어 있어, 특별히 entity를 커스텀하고 싶으면, 클래스를 생성해 주어야 한다.
- xcode -> Editor -> CreateNSManagedObject Subclass
Fetch Saved CoreData
- viewWillAppear()에서 Saved된 CoreData를 호출하기 위해 fetch함수를 구현한다.
func fetchData() {
    guard let appDelegate = UIApplication.shared.delegate as? else { return }
    let context = appDelegate.persistentContainer.viewContext

    do {
        guard let contacts = try context.fetch(Contact.fetchRequest()) as? [Contact] else { return }
        contacts.forEach {
            print($0.name ?? "")
        }
    } catch {
        print(error.localizaedDescription)
    }
}
- AppDelegate에서 persistentContainer를 가져오기 위해 UIApplication.shared.delegate 를 사용한다.
- context에서 fetch(Contact.fetchRequest())를 통해 저장된 데이터를 가져온다.
Save Data to CoreData
let entity = NSEntityDescription.entity(forEntityName: "EntityName", in: context)

if let entity = entity {
    let contact = NSManagedObject(entity: entity, insertInto: context)
    contact.setValue("Davidyoon", forKey: "name")
    contact.setValue("010-5136-3842", forKey: "phoneNumber")
    contact.setValue(2, forKey: "shortcutNumber")

    do {
        try context.save()
    } catch {
        print(error.localizedDescription)
    }
}
- context를 가져와 NSEntityDescription.entity()를 사용하여 entity 정보를 가져온다.
- entity가 존재하면 NSManagedObject로 contact(entity 객체)를 가져온다.
- contact.setValue 함수를 통해 키 값에 맞는 값들을 넣어준다.
- context.save() 통해 값을 저장한다.
Update CoreData
let fetchRequest: NSFetchRequest<NSFetchRequestResult> = NSFetchResult.init(entityName="TaskEntity")

fetchRequest.predicate = NSPredicate(format: "uuid = %@", task.uuid)

do {
   let fetchedData = try context.fetch(fetchRequest)
   guard let objectUpdate = fetchedData[0] as? NSManagedObject else { return }
   objectUpdate.setValue("newValue", forKey: "name")

   do {
        try context.save()
   }
} catch {
    print(error.localizedDescription)
}
- NSFetchRequest를 사용하여 데이터를 entity 데이터를 불러온다.
- NSPredicate로 조건을 설정한다.
- 예제의 경우 uuid가 일치하는 값을 제시했다.
- context.fetch() 함수로 조건에 맞는 데이터를 가져온다.
- fetchedData(Array에 들어 있어 0번째 값을 꺼내서 처리)를 NSManagedObject로 변환하여, setValue로 값을 업데이트 한다.
- context.save()로 값을 저장하면 데이터가 업데이트 된다.
Delete CoreData
- Delete 처리도 Update와 크게 다르지 않다.
let fetchRequest: NSFetchRequest<NSFetchRequestResult> = NSFetchRequest.init(entityName: "TaskEntity")
fetchRequest.predicate = NSPredicate(format: "uuid = %@", task.uuid)

do {
    let fetchedData = try context.fetch(fetchRequest)
    guard let objectDelete = fetchedData[0] as? NSManagedObject else { return }
    context.delete(objectDelete)

    do {
        try context.save()
    } catch let error {
        print(error.localizedDescription)
    }

} catch let error {
    print(error.localizedDescription)
}
- fetchRequest 생성 및 NSPredicate로 조건에 맞는 data 설정.
- context.fetch로 값을 가져와 NSManagedObject로 형 변환.
- context.delete(object)를 사용하여 변환된 object 삭제
- context.save() 로 현재 변경값 저장